
For example Nikon's RAW format is .nef and Cannon's RAW format is .crw but the file formats are all very similar and they contain much of the same information such as metadata about the camera settings and information about the image but there is no way standard way to writing them. So each manufacture has its own unique order to the data in the raw file.
Raw vs Jpeg - The Difference
Now there is one RAW format that not preparatory is in DNG ( Digital Negative format generation ) format and many people convert there RAW files into the DNG formats because of the facts that it was openly documented file format and there is a hope that the files will be opened further into the future then if there kept in a preparatory format.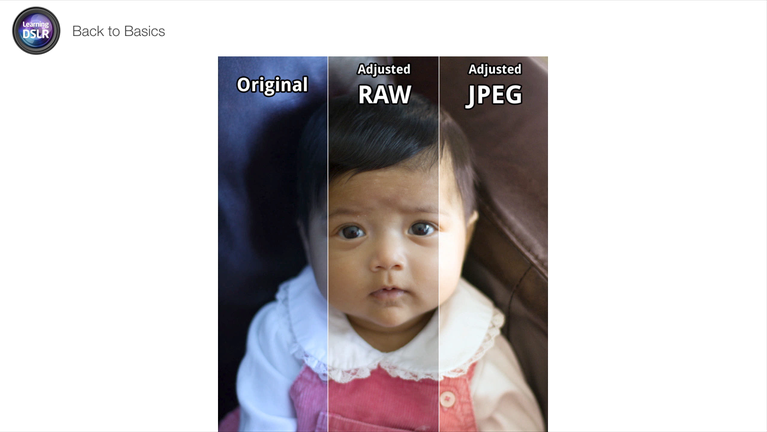
Now Adobe Photoshop is the creator of the DNG file format. The important thing that you should know if you compare the quality of the RAW format vs Jpeg there are lots of information in a RAW file. RAW file is unprocessed as a result you can make greater changes like colors or tone ls values in a RAW files with out losing image quality.
The JPEG file on the other hand has already been processed and that includes having compassion which the roles away the data applied to it and it process applied the camera so you can make it a dramatic exchange to a JPEG file out losing quality.
 When we minimize the Preview Box we see that there are more option coming up below Metadata section including
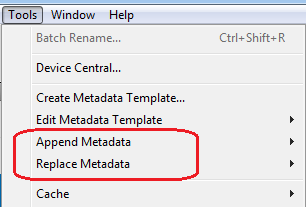 All these features are used to add Metadata in Adobe Bridge and you can easily customize your desired image metadata and keywords. If you want to add some more information about your image then Go to Tools > Append Metadata or chose Replace the Metadata. The difference is if you already had some Metadata as signed in your image and you just want to add more Metadata to it you can use Append Metadata. For example if you already add some Metadata and copyright information of your image but you want to add secondary information about your image like where to use this image, resolution of image or you add a caption then we use Append Metadata tool. Or if you already done with Metadata but want to replace some values then use Replace Metadata Tool.
This is how you add Metadata in Adobe Bridge for your personal blogs, clients websites or in your projects.
All these features are used to add Metadata in Adobe Bridge and you can easily customize your desired image metadata and keywords. If you want to add some more information about your image then Go to Tools > Append Metadata or chose Replace the Metadata. The difference is if you already had some Metadata as signed in your image and you just want to add more Metadata to it you can use Append Metadata. For example if you already add some Metadata and copyright information of your image but you want to add secondary information about your image like where to use this image, resolution of image or you add a caption then we use Append Metadata tool. Or if you already done with Metadata but want to replace some values then use Replace Metadata Tool.
This is how you add Metadata in Adobe Bridge for your personal blogs, clients websites or in your projects.
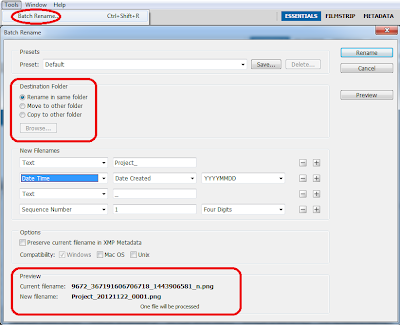 In the Batch Rename dialogue box you will notice, you see lots of customizable options like Rename in the same folder, move to other folder and copy to other folder. In order to give new Filenames of your images you can use vareity different options as your requirment. You can edit